 Austin Home
Austin Home
Austin Home
Well-designed shelving can change how a kitchen feels and functions. In many Chinese kitchens, cabinet interiors must handle rice cookers, woks, spice jars, bowls, and cleaning supplies. Every centimeter matters, especially in narrow apartments. The China Top 10 Kitchen Cabinet Shelving Optimization Tips guide examines practical ways to use that space more effectively.
This article explains how to optimize kitchen cabinet internal shelving through measurable, realistic adjustments. We will consider shelf height, drawer depth, pull-out baskets, corner access, ventilation, and moisture resistance. A 280-millimeter shelf may suit jars, while taller appliances need greater clearance. Small details matter. Cabinet users should measure their actual items before ordering new hardware. Product photographs often hide awkward gaps and difficult hinges.
The recommendations reflect common cabinet planning practices, installation experience, and careful attention to material performance. Moisture-resistant boards, stable hardware, and smooth-edged shelves can improve daily safety and durability. However, no layout works perfectly for every household. A tall pull-out unit may save space but feel unstable when overloaded. Corner shelving may increase capacity yet leave some items difficult to reach. That trade-off deserves honest evaluation.
We also encourage readers to check load ratings and installation instructions from reputable manufacturers. Local climate, cooking habits, and cabinet construction can change the result. Test the layout with real cookware before final installation. It is easy to overdesign. A simpler shelf may serve better. These insights aim to support informed decisions, not promise a universal solution.
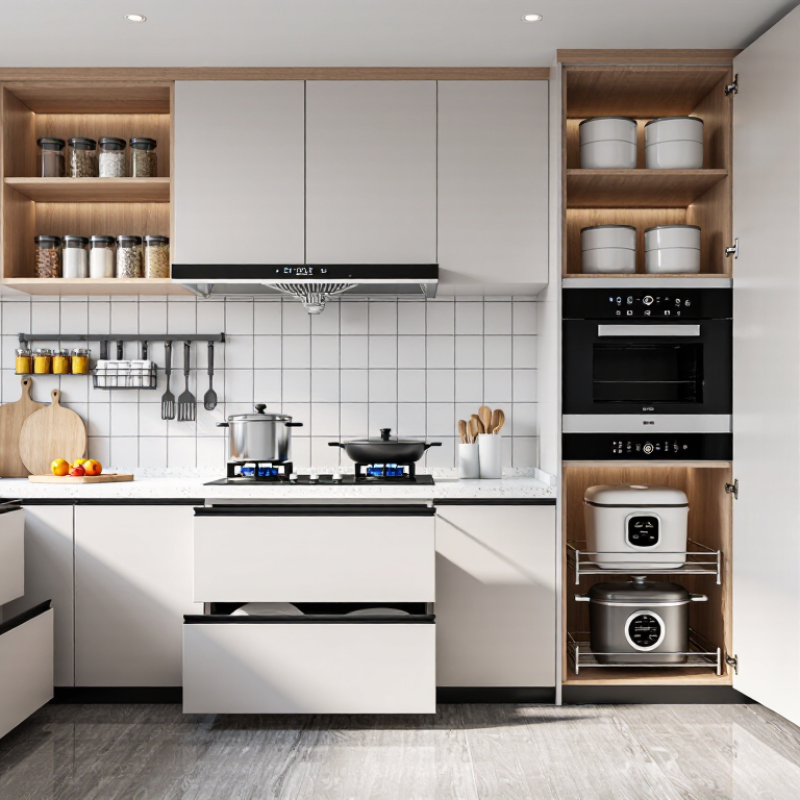
Cabinet Zoning: Apply the Work-Triangle Distance of 1.2–2.7 m
A practical kitchen begins with movement, not cabinet decoration. Keep the refrigerator, sink, and cooktop within a work triangle of 1.2–2.7 meters per leg. This range limits unnecessary walking while leaving enough space for two people to work safely. In compact Chinese kitchens, place the refrigerator near the entrance for quick access. Store daily ingredients on nearby shelves. Keep the sink between preparation and cooking zones when possible. It reduces messy transfers across the room.
Shelving should support each task. Put knives, cutting boards, and mixing bowls beside the sink or preparation counter. Store pots in deep drawers below the cooktop, rather than on high shelves. Heavy appliances need low, stable storage. Keep plates close to the dishwasher or drying area. This arrangement saves small movements repeatedly, especially during busy meal preparation. Measure the actual walking paths, not only the cabinet plan. A peninsula, doorway, or open drawer can interrupt an otherwise perfect triangle. I once focused too much on equal distances and overlooked a refrigerator door blocking the main aisle. The layout looked balanced on paper. It felt awkward in daily use. Allow clear circulation, test shelf heights with common cookware, and revise before installation. Some kitchens need a modified triangle. Efficiency is useful, but real habits should control the final zoning.
| No. | Optimization Tip | Cabinet Zone | Recommended Dimension or Standard | Practical Application | Space and Efficiency Benefit |
|---|---|---|---|---|---|
| 1 | Build a compact work triangle | Refrigerator, sink, and cooktop | Keep each leg approximately 1.2–2.7 m; total triangle distance is commonly kept within about 4–7.9 m. | Place food storage, preparation, and cooking points in a logical sequence without major obstacles between them. | Reduces unnecessary walking and supports a smoother workflow for everyday meal preparation. |
| 2 | Reserve a landing area beside appliances | Refrigerator and oven zone | Provide at least 380 mm of adjacent countertop where possible; a larger area is preferable for frequently used appliances. | Use the counter beside the refrigerator for groceries and the counter beside the oven for hot cookware. | Prevents doors, bags, and hot pans from blocking the main preparation surface. |
| 3 | Center the primary preparation zone | Countertop between sink and cooktop | Target approximately 600–900 mm of uninterrupted preparation space. | Store knives, chopping boards, mixing bowls, and everyday utensils in drawers directly below. | Places the highest-frequency tools near the main work surface and limits repeated opening and closing. |
| 4 | Separate wet and dry storage | Sink, cleaning, and pantry zones | Keep cleaning supplies in a dedicated base cabinet; maintain a dry-storage section away from plumbing connections. | Use the cabinet below the sink for leak-resistant cleaning storage and place grains, cans, and packaged food in a dry pantry unit. | Improves hygiene, protects food from moisture, and makes stock checking easier. |
| 5 | Use drawers for heavy and frequently used items | Lower cabinets | Organize heavy cookware between approximately 300–750 mm above finished floor level where practical. | Place pots, pans, plates, and small countertop appliances in full-extension drawers or pull-out shelves. | Improves visibility and reduces bending, reaching, and unsafe lifting from high shelves. |
| 6 | Place everyday items within comfortable reach | Upper cabinets and mid-level drawers | Keep daily-use items roughly within the 700–1,500 mm reach range, adjusted to household users. | Store cups, bowls, spices, and frequently used utensils at eye or waist height. | Makes routine tasks faster while reducing the need for step stools and excessive stretching. |
| 7 | Optimize corner cabinets | Base-cabinet corners | Use corner pull-outs, rotating shelves, or wide-opening doors; preserve clear access to the full cabinet opening. | Assign corners to less frequently used serving ware, bulk cookware, or small appliances. | Recovers otherwise difficult-to-reach volume without placing daily-use items in inefficient locations. |
| 8 | Create a dedicated waste-sorting station | Between preparation and sink zones | A pull-out cabinet of approximately 300–450 mm width can accommodate separated waste containers, subject to local requirements. | Position waste, recycling, and compost containers close to the main chopping area and sink. | Shortens cleanup routes and prevents waste containers from occupying preparation surfaces. |
| 9 | Maintain safe clearance around the cooktop | Cooking and ventilation zone | Provide a heat-resistant landing area on both sides where possible and follow the appliance manufacturer’s required clearances. | Avoid placing tall pantry units or exposed shelving immediately beside burners unless the design is specifically rated for that use. | Improves fire safety, protects cabinet finishes, and provides a controlled place for utensils and cookware. |
| 10 | Protect circulation and opening clearance | Aisles and opposing cabinet runs | Allow approximately 900 mm for a single-user working aisle; around 1,100–1,200 mm is more comfortable for two users or opposing open doors. | Check refrigerator, dishwasher, oven, and drawer openings before finalizing cabinet depths and island positions. | Reduces collisions and keeps the work triangle functional even when doors and drawers are open. |
Planning note: Dimensions are practical residential planning ranges. Confirm local building regulations, appliance installation instructions, ventilation requirements, accessibility needs, and actual site conditions before fabrication.
A depth of 300–350 mm usually keeps plates, jars, and small appliances visible. It reduces dark, unused space. Measure twice.
Choose 300 mm for narrow cupboards and frequently used items. Bowls and jars stay easier to reach. This depth may feel limiting for bulky cookware.
Choose 350 mm when storing larger pans or cookware. It provides extra room without creating a deep storage tunnel. Very deep containers may still disappear.
Check doors, hinges, shelf supports, and nearby drawers before fixing dimensions. A 10–15 mm adjustment can prevent scraping or blocked movement. Small gaps matter.
A counter height of 850–900 mm can suit many kitchen users. People around 155–165 cm may prefer approximately 850 mm for chopping. Taller users may need 880–900 mm. Comfort still depends on posture and tasks.
Measure elbow height while wearing normal kitchen shoes. Then test a temporary work surface before installation. A starting point is elbow height minus 100–150 mm. It is not a perfect rule.
Keep bowls, rice containers, and cooking oils between waist and eye level. Place daily items where one hand can reach them comfortably. Avoid deep bending for heavy containers.
Adjustable shelf pins help when cookware, containers, or household habits change. They cannot fix every poor layout. I once approved maximum pantry depth and regretted it. The rear shelf became forgotten space.
Recheck wall levels, plumbing, floor slope, appliance doors, and shelf clearances. Floor finishes may add 10–20 mm to the final height. Drawer handles can hit knees unexpectedly. Drawings are not the kitchen.
Optimizing kitchen cabinet shelving begins with thoughtful zoning and practical measurements. This guide explains how to optimize kitchen cabinet internal shelving by organizing storage around the work triangle, keeping key areas approximately 1.2–2.7 meters apart to reduce unnecessary movement. Shelf depths of 300–350 mm improve visibility and make stored items easier to reach, while daily-use shelves should remain between 700 and 1,600 mm from the floor for better ergonomic access.
Safety and user comfort are equally important. Each shelf level should be designed to support at least 15–25 kg, with suitable materials, secure fittings, and balanced weight distribution. For kitchens in China, counter heights of around 850–900 mm can provide a more comfortable working position when matched to the users’ height and habits. Together, these principles create cabinet interiors that are efficient, accessible, durable, and easier to maintain.
